(1) Select a reasonable welding sequence to reduce the welding deformation and the length of the torch travel path to determine the welding sequence.
(2) The space transition of the welding gun requires a short, smooth and safe moving track.
(3) Optimize the welding parameters, in order to obtain the best welding parameters, make working specimens for welding test and process evaluation.
(4) Use a reasonable position of the positioner, the attitude of the welding gun, and the position of the welding gun relative to the joint. After the workpiece is fixed on the positioner, if the weld is not the ideal position and angle, it is required to continuously adjust the positioner during programming so that the welded welds reach the horizontal position one by one in the welding sequence. At the same time, it is necessary to constantly adjust the position of each axis of the robot to reasonably determine the position, angle and extension length of the welding gun relative to the joint. After the position of the workpiece is determined, the position of the welding gun relative to the joint must be observed by the programmer's eyes, which is difficult. This requires the programmer to be good at summing up the accumulated experience.
(5) Insert the clearing gun program in time, and after writing a certain length of welding procedure, the cleaning gun program should be inserted in time to prevent the welding spatter from clogging the welding nozzle and the contact tip, ensure the cleaning of the welding gun, improve the life of the nozzle, and ensure reliable arc ignition. Reduce welding spatter.
(6) The programming procedure is generally not in one step. It is necessary to continuously check and modify the program during the robot welding process, adjust the welding parameters and the posture of the welding gun, etc., to form a good program.
Yaskawa a welding robot programming, the boot1. Turn on the power switch on the control cabinet in the "ON" state.
2. Adjust the operation mode to “TEACH†→ “Teaching modeâ€
Second, welding program editing1. Enter the program editing state:
1.1. Select [Program] at the main menu and open it.
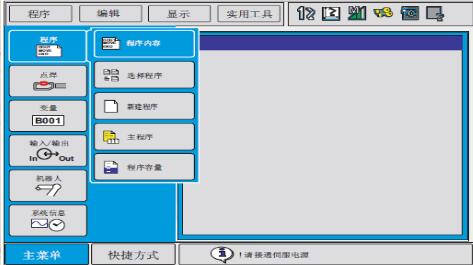
1.2. Select [New Program] in the [Program] main menu.
1.3. Display the new program screen and press the [Select] button.
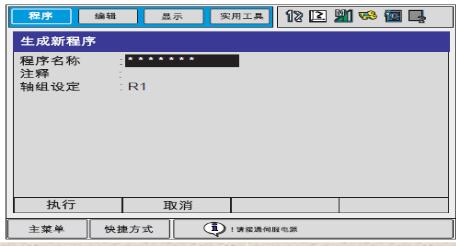
1.4. After entering the character screen, enter the program name and create a new one with "TEST".
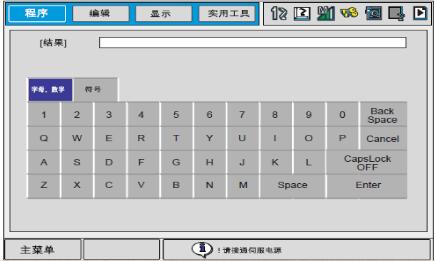
An example of the program name;
1.5. Move the cursor to the letters “Tâ€, “Eâ€, “Sâ€, “T†and press the [Select] key to select each letter;
1.6. Press [Enter] to log in.
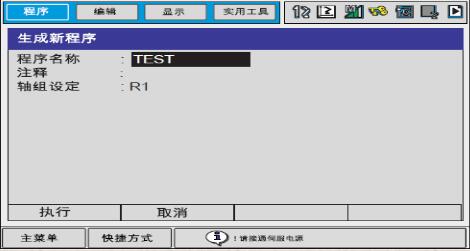
1.7. After moving the cursor to "Execute" and confirming, the program "TEST" is registered, and the initial state of the program "NOP", "END" is displayed on the screen.
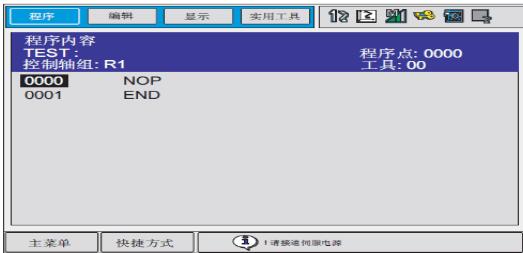
2. Edit the trajectory of the robot (take the robot welding straight seam as an example); move the robot to a safe position, the surrounding environment is easy to work, input program (001)
2.1. Hold the safety power switch and turn on the servo power robot to enter
Actionable state
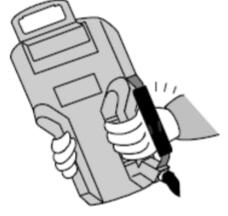
2.2. Move the robot to the start position with the axis operation keys (start position setting job preparation position)
2.3. Press the [Interpolation Mode] key to set the interpolation mode as joint interpolation, and display the joint interpolation command in the input buffer display line, „MOVJ“→â€â€œMOVJ,, VJ=0.78â€

2.4. Place the cursor at "00000" and press [Select];

2.5. Move the cursor to the speed “VJ=**†on the right side, press the [Convert] button + the cursor “Up and Down†button to set the reproduction speed. If the setting speed is 50%, the screen displays “→MOVJVJ= 50%", you can also move the cursor to the speed on the right, after pressing the [Select] button on „VJ=***', you can directly enter the speed you want to set on the screen, and then press [Enter] to confirm.

2.6. Press [Enter] to enter the program point (ie line number 0001)

Most of the offline programming systems for welding robots can be operated in a three-dimensional graphics environment, and can reflect the friendly and convenient programming interface. To obtain the coordinate position of the weld trajectory, the "virtual teaching" method can be used, and the space coordinates of the point can be obtained by simply clicking the welding part of the workpiece in the three-dimensional virtual environment with the mouse.
In addition, in some systems, the weld bead can be directly generated by the previously defined weld position in the graphic file; then the robot program is automatically generated and downloaded to the robot control system, which greatly improves the programming efficiency of the robot and reduces the efficiency of the robot. The labor intensity of the programmer is two things.
If you use traditional teaching programming, you only need to roughly obtain several key points on several weld trajectories, and then automatically track the actual weld trajectory by welding the robot's visual sensor. Although this method is still inseparable from teaching programming, it can reduce the intensity of teaching programming and improve programming efficiency to a certain extent.
However, equipment such as arc welding robots, due to the characteristics of arc welding itself, the robot's visual sensor is not applicable to all weld forms, so it is necessary to adopt a completely off-line programming method to make the robot welding program preparation and weld trajectory. The acquisition of the coordinate position and the debugging of the program are done independently on one computer without the participation of the robot itself.
Just because of the limitations of computer performance at that time, the offline programming software is mainly text-based. The programmer needs to be familiar with all the instruction systems and syntax of the robot, and also know how to determine the spatial position coordinates of the weld trajectory. It seems that the programming of the welding robot is not simple.
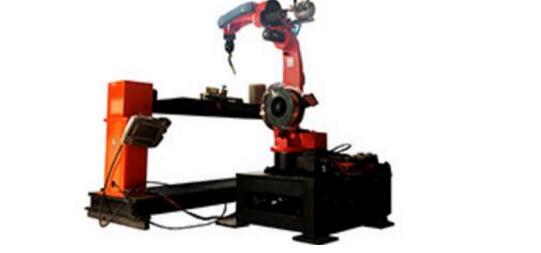
(1) There is a problem of weld bias: it may be that the position of the weld is incorrect or there is a problem when the weld gun is looking for. At this time, consider whether TCP (the position of the torch center point) is accurate and adjust it. If this happens frequently, check the zero position of each axis of the robot and recalibrate it to correct it.
(2) There is a problem of undercut: the welding parameters may be improperly selected, the angle of the welding gun or the position of the welding gun may be incorrect, and may be adjusted appropriately. (3) Porosity problems: It may be that the gas protection is poor, the primer of the workpiece is too thick, or the shielding gas is not dry enough, and the corresponding adjustment can be processed.
(4) Excessive spattering problem: the welding parameters may be improperly selected, the gas composition may be caused, or the outer elongation of the welding wire is too long. The power of the machine may be appropriately adjusted to change the welding parameters, and the gas proportioning instrument may be adjusted to adjust the proportion of the mixed gas. Adjust the relative position of the torch to the workpiece.
(5) An crater problem is formed after cooling at the end of the weld: when the program is added, the buried crater function is added to the work step, which can be filled.
  
15v wall charger,15 Watt Power Supply,15v ac dc adapter,AC Wall Charger Power Adapter,AC/DC Charger Power Supply Switching Adapter,DC 15V Global AC / DC Adapter,15VDC Power Supply Cord Cable Wall Charger,15VDC800 Charger PSU
Shenzhen Waweis Technology Co., Ltd. , https://www.waweispowerasdapter.com